
Alpha Water Softener installation instructions and microprocessor control programming are described below for our popular FGA-M SERIES Metered model. If you are mechanically inclined and have a little experience doing basic plumbing, installing a water softener can be easy. We can guide you through the installation. We provide 7 Day phone support for your installation 914-489-3068 including Sundays and Holidays.
Step 1: LOCATION: The location of your softener is important. It should be in a protected dry, level and non-freezing area (34-120 degrees F). If you have purchased a two tank unit (rather than a single tank cabinet model), the brine tank and resin tank should be placed close to each other. The larger of the two tanks is your brine tank (for softener sodium chloride or potassium chloride salt) and it is the tank that you will have to refill, so be sure to make it the more accessible of the two tanks.
Step 2: ELECTRICAL: You will need a standard 2-prong, 120V, grounded outlet that is not controlled by a switch. The outlet can be up to 50 feet from your softener. The furnished 12V transformer has 10 feet of cord attached. If it is necessary to extend the length of the transformer cord, it may be spliced to a maximum of 50 feet. Basic 18/2 AWG or thicker wire may be used. Splice connectors and extension wire are not included, but are readily available at electrical or hardware stores.
Step 3: BACKWASH DRAIN: You will need a drain for the regeneration
and/or backwashing cycles. If possible, the drain should be no farther
than 40 feet from the water softener. You will need to purchase this flexible
5/8"od diameter (1/2"id inside diameter) plastic tubing from Alpha
Water Systems Inc. or your local hardware or building supply store. The
tubing can be vinyl, polyethylene, polybutylene, etc. Be carefull on corners
with clear tubing! Do not let the ends crimp! The same size tubing will
be used in step 8. The drain line will be under pressure when the regeneration/backwash
cycle is working, therefore make sure the drain line is secured. The drain
line will need to dump into a drain that is a minimum diameter of 1 1/2".
All local plumbing codes should be adhered to.
Note: Never connect the drain line directly into a drain. Use a plumbing
trap. Allow an air gap between the drain tubing and waste line to prevent
the possibility of reverse siphoning. Often times, a washing machine drain
trap is conveniently located and can be used.
Step 4: INSTALLING THE BYPASS: You are now ready to install the bypass valve to the control valve (head). The in and out arrows on the bypass valve should be pointing the same direction as the in and out arrows on the outside of the control valve. The arrows are molded into the plastic (Noryl) on both the bypass valve and the control valve. Use the silicone lubrication (Supplied) to lubricate the 3 o-rings that are placed on to the control valve and install the bypass to the control valve body. The bypass valve has four 2" x 10/24t screws with nuts to tighten the bypass valve to the control valve. Tighten the screws until the bypass valve is firmly seated, but be sure not to over tighten.
Step 5: COPPER CONNECTIONS: Your softener can be ordered with PVC, CPVC Plastic supply as well as copper connections. Let us know what type of pipe fittings, size that you require. This section is on the copper installation. Water connections to and from softener will now be connected to the bypass 1 1/4"IPS male threads by using the two 1 1/4" female nuts provided. Slip one 1 1/4" female nut over one of the flanged copper tailpieces, so that the tube is sticking through the nut and the flanged piece is resting on the inside of the female threaded part of the nut. Use one 1 3/4" o.d. rubber washer to fit into the female part of the nut on top of the flanged tailpiece and screw the nut onto the 1 1/4" IPS male threads on the control valve. Do the same for the other side. Now connect your water source to the tailpieces. Caution: A common problem for beginners is overheating the copper tailpiece stub-outs during the soldering process. This can melt the plastic nuts that connect to the Noryl bypass valve. We recommend that you either sweat first and then install the nuts or place a soaking wet towel over the plastic nuts then sweat the fittings on. The important thing is not to overheat the tailpiece stub-outs. If you have to solder your water connections with the plastic nuts in place on the copper tailpiece, you can wrap the flanged part of the tailpiece (now positioned inside of the plastic nuts) in a wet towel during the soldering process for an additional measure of safety.
Step 6: BRINE CONNECTION: Between the two tanks you will need to connect the furnished brine tube. It will be necessary to connect the tube attached to the brine tank to the mineral tank elbow located below the head.
Step 7: BRINE TANK FILL: With a bucket or hose, pour approximately 4-5 gallons of water into the brine tank. This will be approximately 1" over the salt platform in the bottom of the tank.
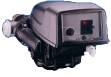
Step 8: METER PROGRAMMING: The following step refers to programming
of the FGA-M metered models only!
Please refer to the manual that was supplied from Alpha Water Systems
Inc. with your softener for detailed instruction on how to program your
specific unit. Plug the softener in following guidelines described in Step
2. Open the access door on the Electronic Controller located beside the
Pointer Knob. You may need a small screwdriver to insert into the small
opening at the side of the door and gently pry open the raised tab. You will
see a set of pins with three words next to them, TIME, HARDNESS, and CAPACITY.
Start with the "jumper" on the set of pins next to the word "TIME". Depress
the black TIME SET BUTTON to set the time-of-day to the closest hour. PM
hours are indicated by a light next to the letters PM on the window display.
Pull the jumper off the TIME pins and place it on the next set of pins next
to the word "HARDNESS". Depress the black TIME SET BUTTON until your correct
hardness is displayed on the window display. The hardness range is from
1 to 99 grains per gallon. You should obtain your water hardness by calling
your local municipal water department or by having your local water source
(well water) tested. Pull the jumper off the HARDNESS pins and place it
on the next set of pins next to the word "CAPACITY". Depress the black TIME
SET BUTTON until the number 35 (for 35,000 grain units) is displayed on the
window display. The capacity range is in kilograins. The maximum capacity
of the 35,000-grain softener is 35,000 grains. Normally adjustment of the
salt dial is not necessary. It is normally factory set (at 8 - 12 lbs) for
the best efficiency; however, it can be changed as necessary. Pull the jumper
off the CAPACITY pins and place it again on the top set of pins next to
the word "TIME" and close the access door. The jumper must NOT be
left on any pins other than the top pair next to the word "TIME". Failure
to do this will prevent the unit from operating properly.
Step 9: BUY SALT OR POTASSIUM: Purchase water softener sodium chloride or potassium chloride salt and put 80 lbs in the brine tank at this time. The tank will hold a large quantity of salt, so you won't have to refill at frequent intervals. You can fill the brine tank half way with additional sodium chloride or potassium chloride salt after your system is successfully installed and operating trouble-free.
Step 10: PUTTING UNIT IN SERVICE: Make sure the main water supply is off. Depress the Pointer Knob to backwash. With the water supply off, place the bypass valve into the service position. Open the water supply valve very slowly to approximately the 1/4 open position. In this position, you should hear air escaping slowly from the drain line. CAUTION: If opened too rapidly or too far, some mineral (resin) may be lost and plugging of the valve is possible. When water begins to flow steadily from the drain, signifying the air has been purged from the tank, open the main water supply valve all the way. Let the unit run through a complete backwash cycle. This will allow the softener salt (or potassium chloride) to be introduced into the mineral tank so it can begin to soften your water.
.Step 11: CHECK FOR LEAKS: Check for leaks and tighten any loose fittings.
Step 12: Thank you for purchasing an ALPHA WATER SOFTENER.
You can now enjoy soft water for many, many years!
We have a 7 day installation line 914-489-3068 We take you step
by step through the installation via phone to understand the product. Other
companies only have online manuals with no human direct installation tech
support. We have only USA water treatment specialists on call 7 days!
Alpha Water Softeners have a 10 Year Warranty!
Additional Notes: If using copper pipe, we recommend using type L copper. Type L is thicker than type M heating line copper. We highly recommend that you install a surge protector before the power supply. As in the case of most electronic devices, the power supply is susceptible to damage by power surges. For awhile your pipes and water heater might give off some hard water sediment as the accumulated deposits exchange back into the now soft water. Drain your heater at least once a week until you get no more sediment.
With soft water, remember not to use as much soap for dishwashing, laundry, etc. Many people report needing to use only about 1/3 to 1/2 as much as they previously needed. Remember to check with local plumbing code officials and do your installation per local codes.
![]()
View Our Guestbook
Sign Our Guestbook
Questions? E-mail us for answers. alphasys@warwick.net